Working Apps
- OBS
- Discord
- Vivaldi
- Steam
- BattleNet
- StreamDeck
- Sound
- Vtube Studio
- Tourbox
- Nouvelle Gestion des serveurs Dockers
OBS
Install
Just install from the Discover Shop
Plugins
Pipewire Audio Capture
Description
Let's you capture any application sound individually
Install
https://obsproject.com/forum/resources/pipewire-audio-capture.1458/
Discord
Install
You can install from the discovery store but i had varying success with it so instead i used the flathub installation system : https://flathub.org/en/apps/com.discordapp.Discord
Vivaldi
Install
Vivaldi has issues when installed through the discovery app so i prefer to download the rpm package through their website : https://vivaldi.com/fr/download/
It may crash the first time you start it and I have no idea why but it just works afterwards.
Steam
Install
So steam was more of an issue because it wasn't showing at first in the app but if you go in discovery and then in settings you will find all the repositories you can download from and some of them are unchecked ( you need to have selected the fact you can use third party repositories during the installation process of Fedora KDE otherwise you might not see this option )
I checked everything that's steam related and also the main rpm Fusion non free otherwise some packages might not download (you probably don't need steam debug and steam source but I'm new to this too :P)
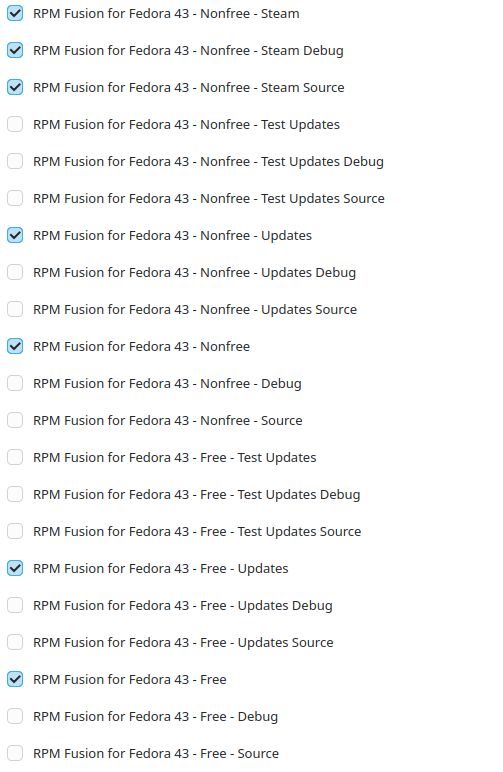
After that you just need to search steam and you should be able to find it now.
BattleNet
Install
So if you want to install battlenet and play anygame on it you will need a layer to do so. You have multiple solutions :
- Make BattleNet a steam game
- Lutris
- Heroic
- Others that i don't remember
I tried the steam thing first and it was a great idea ... until it was became a mess depending on if you are on kde or gnome, the version of fedora, ...
So i went for Lutris which works very well outside of the fact that the login window can glitch out sometimes but you just need to over with the mouse and stuff should reappear.
Lutris
Just download lutris from the discovery app, start it, look for battlenet follow the step by step instructions and when you do something like closing the login window and nothing happens just trust the process and wait ... go make a coffee or something i guess.
StreamDeck
Install
Just download and follow the opendeck docs it's perfect : https://github.com/nekename/OpenDeck
Sound
Mix
On Fedora 43, you don’t install “virtual drivers” the Windows way. With PipeWire (which Fedora uses by default), you create virtual devices (nodes) such as sinks (outputs) or sources (inputs). These act like Voicemeeter’s virtual inputs/outputs.
Below are the main methods — from simple to advanced.
✅ Method 1 — Create a Virtual Sink (most common)
This creates a virtual output device that applications can send audio to. You can then route it wherever you want.
1️⃣ Create the virtual sink
pactl load-module module-null-sink sink_name=VirtualSink sink_properties=device.description=VirtualSink
You now have a new output device called VirtualSink.
2️⃣ Create a virtual microphone (optional)
If you want something like a “virtual mic” (for Discord/OBS):
pactl load-module module-remap-source master=VirtualSink.monitor source_name=VirtualMic source_properties=device.description=VirtualMic
Now VirtualMic appears as an input device in apps.
3️⃣ Make it persistent (survive reboot)
Create this file:
mkdir -p ~/.config/pipewire/pipewire-pulse.conf.d
nano ~/.config/pipewire/pipewire-pulse.conf.d/virtual-devices.conf
Add:
context.modules = [
  { name = libpipewire-module-null-audio-sink
    args = {
      node.name = "VirtualSink"
      node.description = "VirtualSink"
      media.class = "Audio/Sink"
    }
  }
]
Then restart PipeWire:
systemctl --user restart pipewire pipewire-pulse
🎛 Method 2 — Use a Patchbay (Graphical Way)
Much easier if you don’t like CLI.
🔌 qpwgraph
qpwgraph

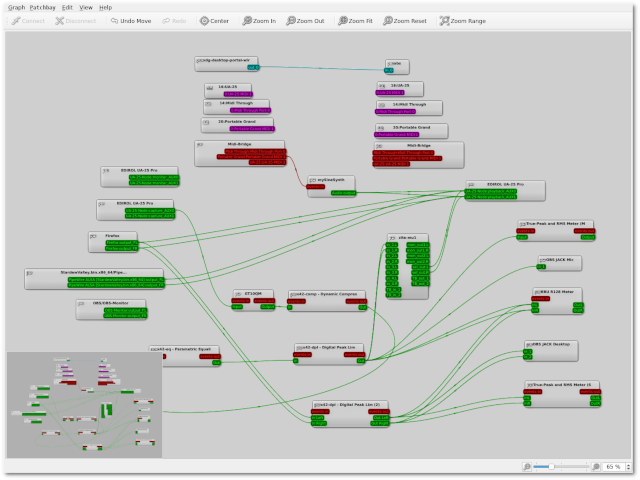

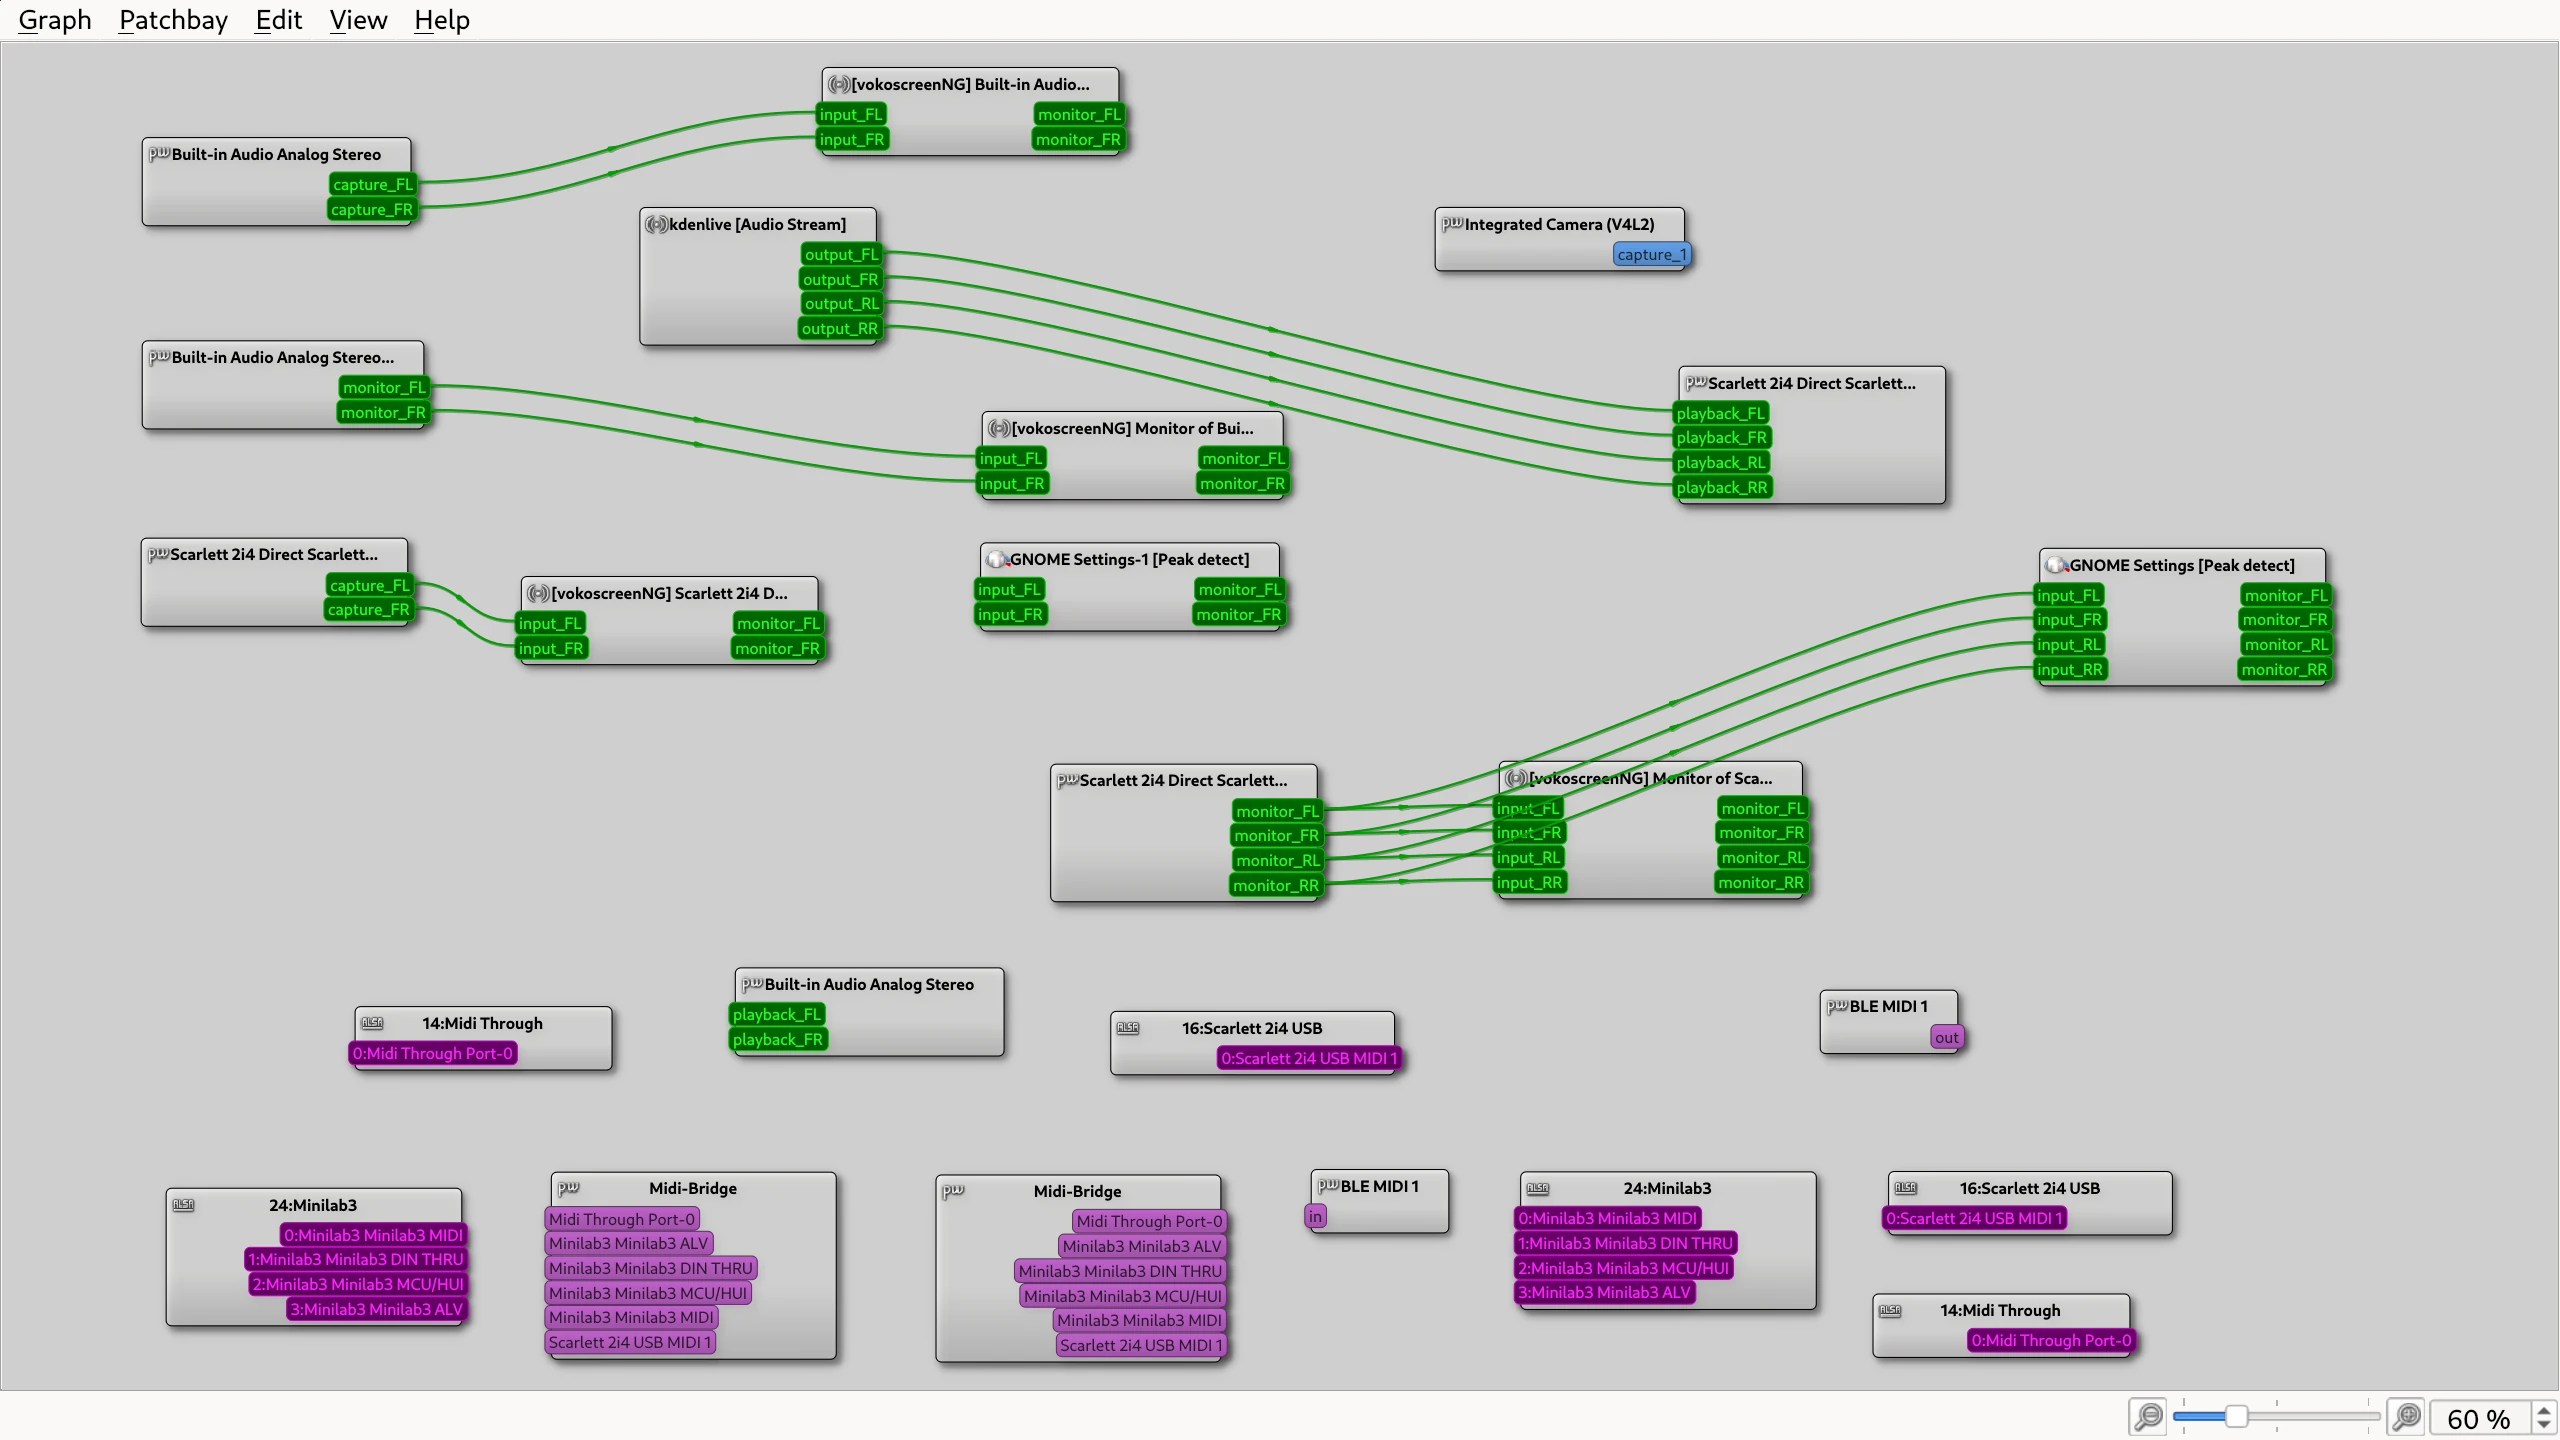
Install:
sudo dnf install qpwgraph
Launch:
qpwgraph
You can visually connect:
- App → Virtual Sink
- Virtual Sink → Hardware Output
- Virtual Sink → OBS / Discord
🔌 Helvum (simpler UI)
Helvum

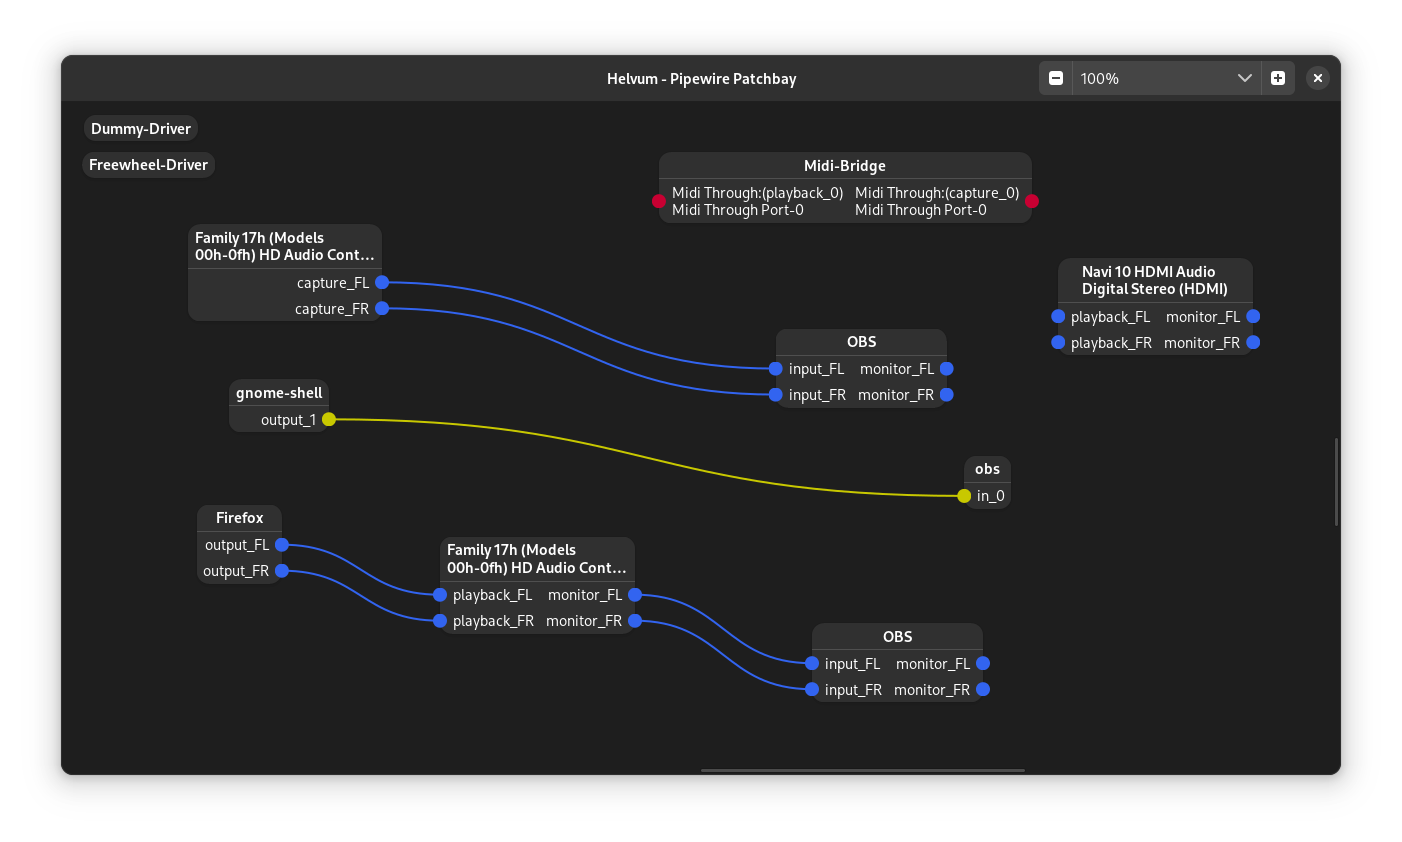

Install:
sudo dnf install helvum
Very simple drag-and-connect interface.
🎚 Method 3 — PulseMeeter (Voicemeeter-style interface)
PulseMeeter
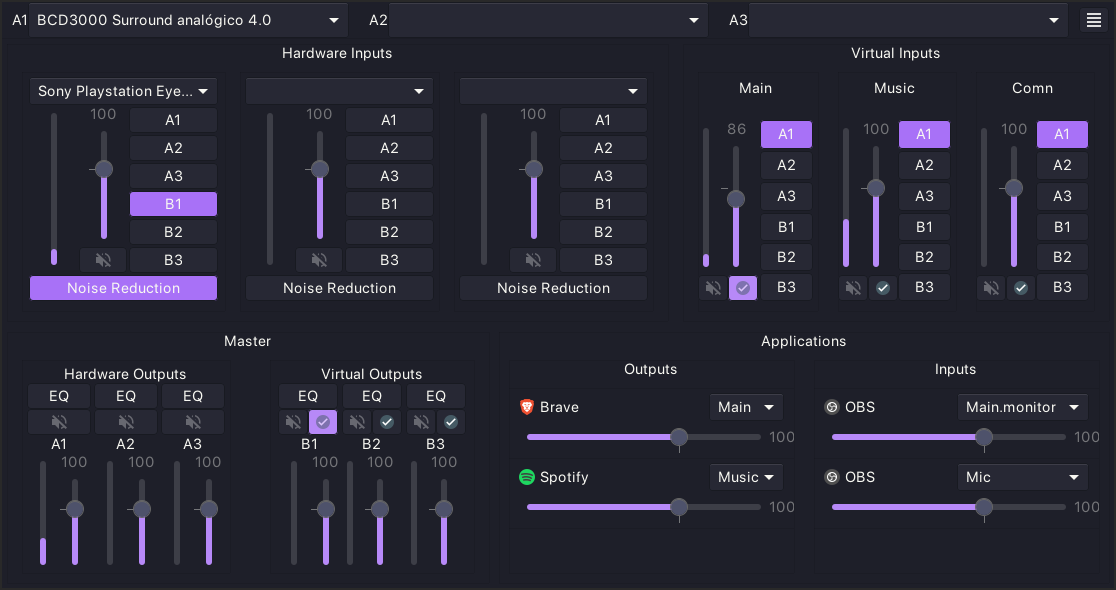
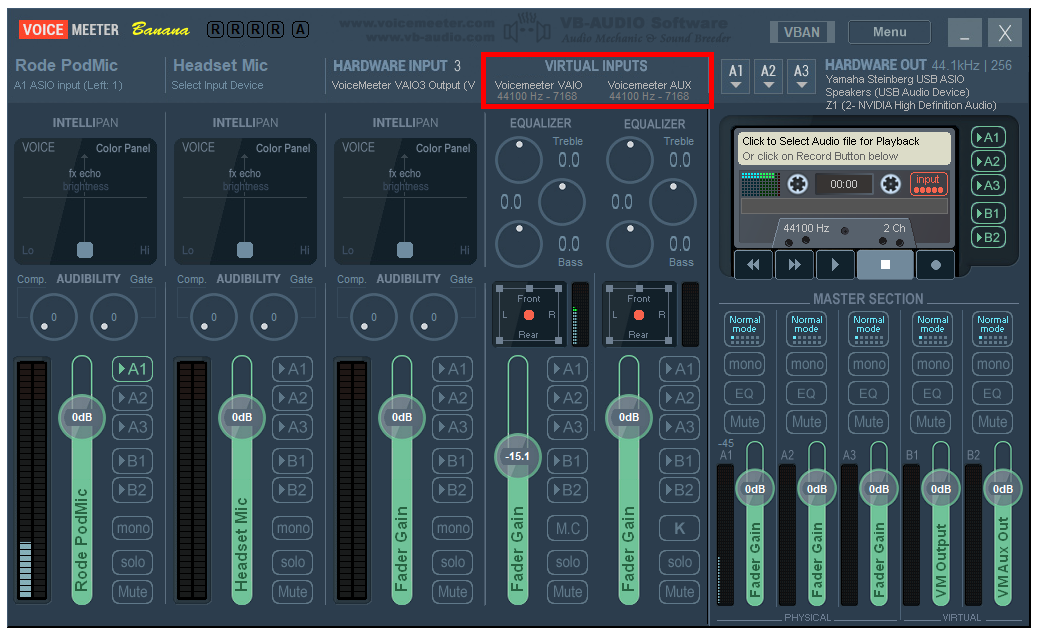
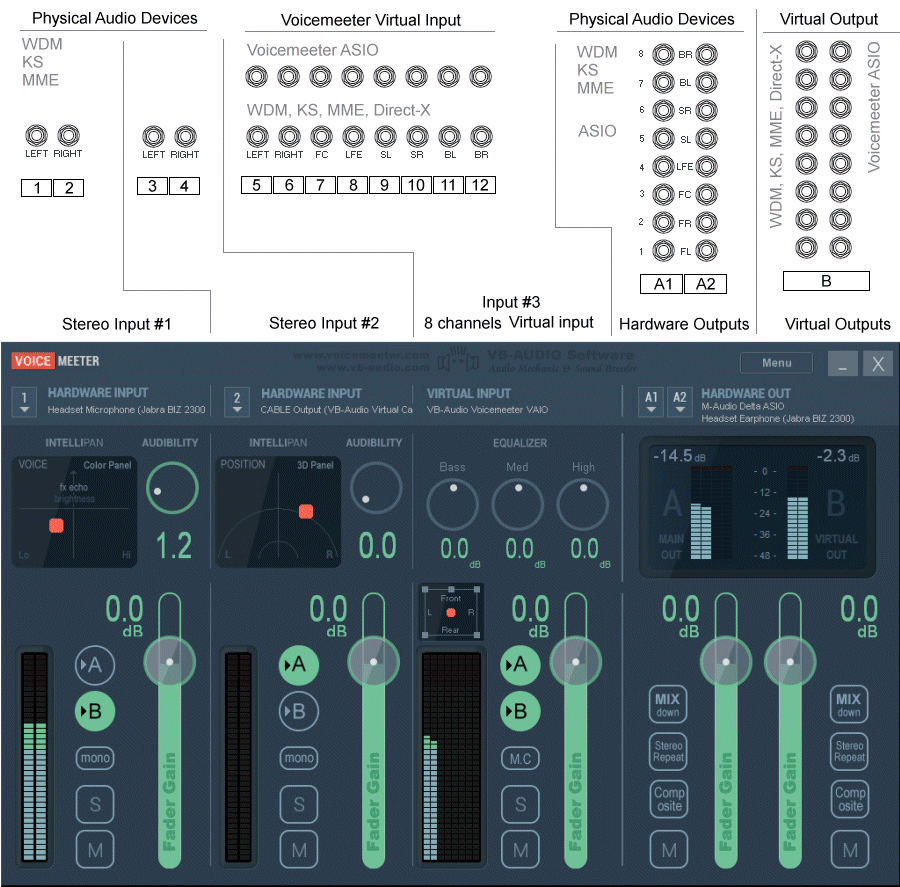
This is the closest conceptual match to Voicemeeter:
- Virtual inputs
- Virtual outputs
- Routing matrix
- Volume control
Install:
sudo dnf install pulsemeter
(If not in repo, use GitHub release or COPR.)
🧠 What You Usually Want (Common Scenarios)
🎮 Route Game + Spotify → One virtual device → Discord
Create:
- VirtualSink
- VirtualMic (monitor of sink)
- Set Discord mic to VirtualMic
- Route apps into VirtualSink
🎥 OBS separation (game + mic separate)
Create:
- 2 null sinks
- Route each app separately
- Capture each sink monitor in OBS
🔎 Check Existing Devices
pactl list short sinks
pactl list short sources
⚡ Important
Because Fedora uses PipeWire, you do not need:
- PulseAudio replacement
- Kernel drivers
- External sound drivers
Virtual devices are just software nodes.
If you tell me your exact goal (streaming? mixing mic + music? dual PC? Discord routing?), I can give you the exact commands and layout for your setup.
Vtube Studio
How to install
Staight from Steam it should work
Spout for Vtube Studio to OBS
https://github.com/hoshinolina/spout2pw/wiki
Tourbox
TuxBox — Linux Driver for TourBox Controllers


Linux driver for the TourBox Lite, Neo, Elite and Elite Plus by TourBox Tech Inc. Connects via USB or Bluetooth LE with button response so seamless, you'll forget it's not the official driver.
Device Compatibility
| Device | Connection | Haptics | Notes |
|---|---|---|---|
| TourBox Elite | USB, Bluetooth | ✅ | Full support |
| TourBox Elite Plus | USB, Bluetooth | ✅ | Full support |
| TourBox Neo | USB only | ❌ | Full Support |
| TourBox Lite (USB) | USB only | ❌ | Full support |
| TourBox Lite (Bluetooth) | Bluetooth only | ❌ | Full Support |
Features
- ✅ Graphical Configuration - Full-featured GUI for visual configuration with live preview
- ✅ USB and Bluetooth LE - Connect via USB cable or wirelessly via Bluetooth
- ✅ Haptic Feedback - Configurable vibration feedback for rotary controls (Elite series only)
- ✅ Application Profiles - Different button mappings per application (Wayland and X11)
- ✅ Window Detection - Automatic profile switching based on focused window
- ✅ Full Button Mapping - All 20 controls configurable (buttons, knobs, scroll wheel, dial)
- ✅ Modifier Keys - Create over 250 unique key combinations per profile using physical buttons as modifiers
- ✅ Import/Export Profiles - Import and Export profiles to share with the community
- ✅ Systemd Integration - Runs as a user service, starts on login
- ✅ Non-Systemd Support - Works with OpenRC, runit, s6, and other init systems

Requirements
System Requirements
- Linux (Debian, Ubuntu, Linux Mint, Fedora, Arch tested)
- Python 3.9+
- Bluetooth support (bluez) - for Bluetooth LE connection
- User must be in
dialoutgroup - for USB connection - Build tools for compiling Python packages:
- Debian/Ubuntu:
gcc python3-dev linux-headers-generic libxcb-cursor0 - Fedora/RHEL:
gcc python3-devel kernel-headers - Arch:
gcc python linux-headers
- Debian/Ubuntu:
- Running on Wayland or X11 (for app-specific profiles, X11 requires
xdotool)
Note: The
install.shscript will check for these dependencies and tell you what to install if anything is missing.
Python Dependencies
- For GUI configuration tool:
- PySide6 >= 6.5.0 (Qt6 for Python)
- qasync >= 0.24.0 (async Qt support)
- Automatically installed by
install.sh
Additional Requirements for Profile Mode
- For profile mode (app-specific mappings):
- KDE Plasma (Wayland):
kdotoolrequired (see installation instructions below) - GNOME (Wayland): Focused Window D-Bus extension required (see installation instructions below)
- Sway/Hyprland/Niri/Mango: No additional requirements
- X11 (all desktops):
xdotoolrequired (see installation instructions below)
- KDE Plasma (Wayland):
Quick Install
Connection Options
The driver supports two connection methods:
| Method | How to Use | Requirements |
|---|---|---|
| USB | Just plug in the USB-C cable | User in dialout group |
| Bluetooth LE | Just turn on the TourBox (don't connect USB) | Bluetooth enabled |
The driver auto-detects everything:
- USB: Scans
/dev/ttyACM*devices and probes each for a TourBox response - Bluetooth: Scans for any device named "TourBox" and connects automatically
Note: Some Bluetooth equipped models do not require pairing depending on what firmware is installed on them. The driver finds your TourBox automatically by scanning for its name. If the driver doesn't find your TourBox, try putting it in pairing mode (hold the button above the power switch for 2-3 seconds until the LED flashes) and restart the driver with
File->Restart Driverin the Configuration GUI. After the first successful connection, normal power cycles should reconnect automatically without needing pairing mode again.
Run the Installer
git clone https://github.com/AndyCappDev/tuxbox.git
cd tuxbox
./install.sh
The installer will:
- Create a Python virtual environment
- Install the driver and dependencies
- Install and enable the systemd service
Log out and log back in or reboot to activate the driver.
Additional Step for KDE Plasma Users
If you're using KDE Plasma on Wayland and want profile mode (app-specific mappings), you need to install kdotool:
# 1. Install build dependencies
sudo apt install build-essential pkg-config libdbus-1-dev libxcb1-dev

# 2. Install Rust (if not already installed)
curl --proto '=https' --tlsv1.2 -sSf https://sh.rustup.rs | sh
# Choose option 1 for standard installation when prompted
source $HOME/.cargo/env

# 3. Install kdotool
cargo install kdotool

# 4. Verify installation
kdotool --version
Additional Step for GNOME Users
If you're using GNOME on Wayland and want profile mode (app-specific mappings), you need to install the "Focused Window D-Bus" extension:
- Visit Focused Window D-Bus extension page
- Click the Install button
- Verify installation:
gnome-extensions list | grep focused-window-dbus
# Should show: focused-window-dbus@flexagoon.com
Without this extension, profile mode will not work on GNOME (the driver will use the default profile for all apps).
Additional Step for Sway/Hyprland/Niri/Mango Users
No additional software required - profile mode works out of the box using the compositor's built-in IPC.
Additional Step for X11 Users
If you're using X11 (Cinnamon, MATE, XFCE, i3, etc.) and want profile mode (app-specific mappings), you need to install xdotool:
# Debian/Ubuntu/Mint
sudo apt install xdotool

# Fedora/RHEL
sudo dnf install xdotool

# Arch
sudo pacman -S xdotool
Verify installation:
xdotool --version
Linux Mint users: The version of
xdotoolin the Mint repositories may be too old (v3.20160805.1 doesn't support the commands this driver needs). If profile switching doesn't work, you may need to build xdotool from source:sudo apt install libxtst-dev libxinerama-dev libxkbcommon-x11-dev git clone https://github.com/jordansissel/xdotool.git cd xdotool make sudo make install
Updating
To update to the latest version:
cd /path/to/tuxbox
git pull
./install.sh
The installer will automatically:
- Stop the running service if it's active
- Update all files and dependencies
- Preserve your existing configuration by default
- Ask if you want to restart the service with the new version
Note: It's safe to run the installer while the service is running - it will handle stopping and restarting automatically. Your configuration file and all profiles are preserved during updates.
Configuration GUI
The driver includes a graphical configuration tool that makes it easy to configure button mappings without editing config files manually.
Running the GUI
After installation, simply run:
tuxbox-gui
You can also run it from the Application Launcher or pin it to your Application Manager after you run it for the first time for easy access.
What You Can Do with the GUI
- Visual Configuration - See a diagram of your TourBox with visual feedback while editing control mappings
- Profile Management - Create, edit, and delete application-specific profiles
- Window Matching - Use "Capture Active Window" to detect windows for application profile matching
- Testing - Test your button mappings in your applications without having to quit the configuration GUI
- Easy Key Assignment - Point-and-click interface for keyboard shortcuts and mouse wheel actions
- Check for Updates - Easily check if a newer version is available (Help → Check for Updates)
See the Complete GUI User Guide for detailed instructions, tutorials, and troubleshooting.
Manual Installation
If you prefer manual setup, first ensure you have the build dependencies installed:
# Debian/Ubuntu
sudo apt install gcc python3-dev linux-headers-generic libxcb-cursor0 bluez python3-pip

# Fedora/RHEL
sudo dnf install gcc python3-devel kernel-headers bluez python3-pip

# Arch
sudo pacman -S gcc python linux-headers bluez python-pip
Then proceed with installation:
# 1. Create virtual environment
python3 -m venv venv

# 2. Install the driver and GUI dependencies
./venv/bin/pip install -e .
./venv/bin/pip install -r tuxbox/gui/requirements.txt

# 3. Copy config (legacy format - GUI will migrate on first launch)
mkdir -p ~/.config/tuxbox
cp tuxbox/default_mappings.conf ~/.config/tuxbox/mappings.conf

# 4. Set up udev rules for uinput access
echo 'KERNEL=="uinput", MODE="0660", GROUP="input", OPTIONS+="static_node=uinput"' | sudo tee /etc/udev/rules.d/99-uinput.rules
sudo udevadm control --reload-rules
sudo modprobe uinput
echo "uinput" | sudo tee /etc/modules-load.d/uinput.conf

# 4b. Keep ModemManager off the TourBox serial port (USB connections)
sudo tee /etc/udev/rules.d/99-tourbox.rules > /dev/null <<'EOF'
SUBSYSTEM=="tty", ATTRS{idVendor}=="c251", ATTRS{idProduct}=="2005", ENV{ID_MM_DEVICE_IGNORE}="1"
SUBSYSTEM=="tty", ATTRS{idVendor}=="2e3c", ATTRS{idProduct}=="5740", ENV{ID_MM_DEVICE_IGNORE}="1"
EOF
sudo udevadm control --reload-rules

# 5. Add user to input group (required for device access)
sudo usermod -a -G input $USER
# You'll need to log out and back in for this to take effect

# 6. Add user to dialout group (for USB access)
sudo usermod -a -G dialout $USER

# 7. Set up systemd service
mkdir -p ~/.config/systemd/user
nano ~/.config/systemd/user/tuxbox.service
# Add the following content (replace /path/to/tuxbox with actual path):
#
# [Unit]
# Description=TuxBox Driver
# After=graphical-session.target
# PartOf=graphical-session.target
#
# [Service]
# Type=simple
# ExecStart=/path/to/tuxbox/venv/bin/python -m tuxbox
# Restart=on-failure
# RestartSec=5
#
# [Install]
# WantedBy=graphical-session.target

# 8. Enable and start service
systemctl --user daemon-reload
systemctl --user enable tuxbox
systemctl --user start tuxbox
Non-Systemd Systems (OpenRC, runit, etc.)
The driver works on systems without systemd. The installer will detect this and skip systemd service setup. You'll need to:
-
Create your own init script for your init system (OpenRC, runit, s6, etc.)
-
Configure a restart command for the GUI to use when restarting the driver. Add to
~/.config/tuxbox/config.conf:
[service]
restart_command = rc-service tuxbox restart
Examples for different init systems:
- OpenRC:
rc-service tuxbox restart - runit:
sv restart tuxbox - s6:
s6-svc -r /run/service/tuxbox
Note: Saving profiles in the GUI works without any configuration (it sends a reload signal directly to the driver process). Only the "File → Restart Driver" menu option requires the custom command.
The driver can also be run manually:
/path/to/tuxbox/venv/bin/python -m tuxbox
Example OpenRC Init Script (Gentoo)
Create /etc/init.d/tuxbox:
#!/sbin/openrc-run

name="TuxBox Driver"
description="TuxBox - Linux driver for TourBox controllers"
command="/home/USER/tuxbox/venv/bin/python"
command_args="-m tuxbox"
command_background=true
command_user="USER:USER"
pidfile="/run/${RC_SVCNAME}.pid"

depend() {
    need localmount
    after bootmisc
}
Replace USER with your username (in three places) and update the path if needed. Then:
sudo chmod +x /etc/init.d/tuxbox
sudo rc-update add tuxbox default
sudo rc-service tuxbox start
Configuration
The easiest way to configure button mappings is with the graphical configuration tool (see below). For manual editing, profiles are stored in ~/.config/tuxbox/profiles/ as individual .profile files.
Note: Legacy configs at
~/.config/tourbox/mappings.confare automatically migrated when you first run the driver or GUI.
Legacy Format (Single File)
If editing manually before running the GUI, the config uses profiles - the [profile:default] section is required and contains your main button mappings:
[profile:default]
# Button mappings
side = KEY_LEFTMETA
top = KEY_LEFTSHIFT
tall = KEY_LEFTALT
# ... more buttons

# Rotary controls
scroll_up = REL_WHEEL:1
scroll_down = REL_WHEEL:-1
knob_cw = KEY_LEFTCTRL+KEY_EQUAL    # Zoom in
knob_ccw = KEY_LEFTCTRL+KEY_MINUS   # Zoom out
# ... more rotary controls
App-Specific Profiles
You can add app-specific profiles that automatically switch when you focus different windows:
[profile:vscode]
window_class = Code
side = KEY_LEFTCTRL+KEY_SPACE          # Code completion
knob_cw = KEY_LEFTCTRL+KEY_EQUAL       # Zoom in
dpad_left = KEY_LEFTCTRL+KEY_PAGEUP    # Previous tab
dpad_right = KEY_LEFTCTRL+KEY_PAGEDOWN # Next tab
# ... all other buttons

[profile:firefox]
window_class = firefox-esr
side = KEY_LEFTALT+KEY_LEFT     # Back
top = KEY_LEFTALT+KEY_RIGHT     # Forward
knob_cw = KEY_LEFTCTRL+KEY_EQUAL    # Zoom in
# ... all other buttons
Note: On X11, app-specific profiles require xdotool. On Wayland, see the compositor-specific requirements above.
Haptic Feedback
The TourBox Elite has built-in haptic motors that provide vibration feedback when rotating the knob, scroll wheel, or dial. You can configure haptic strength per profile:
[profile:default]
haptic = strong    # off, weak, or strong

# Per-dial settings (optional, overrides global)
haptic.knob = weak
haptic.scroll = strong
haptic.dial = off
Configure haptic settings via the GUI (Profile Settings dialog) or edit the config file directly. Haptic feedback is only available on TourBox Elite / Elite Plus - the Neo model does not have haptic motors.
After editing, restart the service:
systemctl --user restart tuxbox
Usage
Service Management
# Start the driver
systemctl --user start tuxbox

# Stop the driver
systemctl --user stop tuxbox

# Check status
systemctl --user status tuxbox

# View logs
journalctl --user -u tuxbox -f

# Restart after config changes
systemctl --user restart tuxbox
Manual Testing
Before running the driver manually, you must stop the systemd service first:
# Stop the service
systemctl --user stop tuxbox

# Navigate to the tuxbox directory
cd /path/to/tuxbox

# Run directly in terminal with verbose logging (auto-detects USB/BLE)
./venv/bin/python -m tuxbox -v

# Or force a specific connection mode:
./venv/bin/python -m tuxbox --usb -v   # Force USB
./venv/bin/python -m tuxbox --ble -v   # Force Bluetooth
Press Ctrl+C to stop.
When you're done testing, restart the service:
systemctl --user start tuxbox
Uninstall
./uninstall.sh
Or manually:
systemctl --user stop tuxbox
systemctl --user disable tuxbox
rm ~/.config/systemd/user/tuxbox.service
rm -rf ~/.config/tuxbox
systemctl --user daemon-reload
Troubleshooting
Service won't start
Check logs:
journalctl --user -u tuxbox -n 50
Common issues:
- TourBox not powered on or out of range (for Bluetooth)
- TourBox may need to be in pairing mode for initial Bluetooth discovery
- USB cable not connected or power-only cable (for USB)
- Missing Python dependencies
- Device already connected to another system
USB not detected
If the driver doesn't detect your USB connection:
# Check if any ttyACM devices exist
ls -la /dev/ttyACM*

# Check if you're in the dialout group
groups | grep dialout

# If not in dialout group, add yourself:
sudo usermod -a -G dialout $USER
# Log out and back in for this to take effect
Make sure you're using a data cable, not a power-only charging cable. Try a different USB-C cable if the device doesn't appear.
If you have multiple USB serial devices (Arduino, etc.), the TourBox might not be on /dev/ttyACM0. The driver automatically scans all /dev/ttyACM* devices, but you can also specify the port manually:
# Find which port the TourBox is on
ls -la /dev/ttyACM*

# Run with a specific port
./venv/bin/python -m tuxbox --usb --port /dev/ttyACM1

# Or set it in your config file (~/.config/tuxbox/config.conf):
# [device]
# usb_port = /dev/ttyACM1
USB device keeps disconnecting and reconnecting
If the device connects but drops after a few button presses with:
Serial read error: device reports readiness to read but returned no data
(device disconnected or multiple access on port?)
...then another process is reading /dev/ttyACM0 and stealing bytes from the
driver. Find out what:
# Run while the driver is connected - names every process holding the port
sudo fuser -v /dev/ttyACM0
The usual culprit is ModemManager, which probes CDC-ACM devices with AT commands and is pulled in by NetworkManager on most distros. The install script adds a udev rule to stop it; if you installed manually, see step 4b above, then replug the cable.
The other common cause is running two copies of the driver at once — check for a running service before starting one by hand:
systemctl --user status tuxbox
"/dev/uinput" cannot be opened for writing
If you see this error in the logs, the uinput device permissions aren't set correctly. The install script should handle this automatically, but if needed, fix it manually:
# Create udev rule
echo 'KERNEL=="uinput", MODE="0660", GROUP="input", OPTIONS+="static_node=uinput"' | sudo tee /etc/udev/rules.d/99-uinput.rules

# Reload udev and load module
sudo udevadm control --reload-rules
sudo modprobe uinput

# Ensure module loads on boot
echo "uinput" | sudo tee /etc/modules-load.d/uinput.conf

# Verify permissions
ls -l /dev/uinput
# Should show: crw-rw---- 1 root input
Profile switching not working
Profile mode requires Wayland or X11 with xdotool. Verify your session type:
echo $XDG_SESSION_TYPE
# Should output: wayland or x11
For X11, ensure xdotool is installed:
xdotool --version
Test window detection:
./venv/bin/python -m tuxbox.window_monitor
Buttons not responding
Make sure you're a member of the input group:
sudo usermod -a -G input $USER
# Log out and back in
Documentation
- GUI User Guide - Complete guide for the graphical configuration tool
- Configuration guide - Manual config file editing
- Example configurations
- Development guide
- Why no overlay features? - TourMenu, HUD, and Linux desktop fragmentation
- Button timing trade-offs - Understanding delays with combos and double-press
License
MIT License - See LICENSE.txt file
Community Testers
Thanks to these users for testing and confirming device compatibility:
- @PunkunHm - TourBox Lite (USB)
https://github.com/AndyCappDev/tuxbo
Nouvelle Gestion des serveurs Dockers
Sur gitea il y 4 répertoires git qui correspondent chacun à un serveur à l'exception des docker compose inactifs qui sont dans un répertoire séparé :
- srv16-docker-webserver
- srv16-https-docker
- vps-docker
- inactive-docker (à corriger car je ne me souviens plus du nom exact
Chacun de ces répertoires peuvent ou pourront (actuellement que srv16-docker-webserver) être cloner sur leur serveur respectif avec la commande sudo git clone http://192.168.10.241:3001/votre-repertoire-docker.git
Vous pouvez récupérez